The long-awaited HUMAN 81 DK is now available.
Best viewed in "landscape" mode.
How to:
Add Braces to a Cabinet
Adding internal braces to a typical affordable loudspeaker cabinet can be very beneficial. They will stiffen the panels, reducing resonant modes and also transmission of vibration from the inside of the box (generated from the rear of the woofers) to the outside. The result should be tighter, cleaner bass, and a general cleaning up of some of the midrange.
Basically, the goal is to make the cabinet as "dead" or inert acoustically as possible. Speakers built to a substantially higher price point will typically (but not always) have much heavier, braced cabinets. This is what we are trying to achieve by adding braces to more affordable speakers. We want to do this while altering the volume of the box as little as possible, so the braces should be fairly slender when retrofitting them. This is not a problem, since wood is strongest under compression along its grain. With new cabinets you just allow for the brace volume and use as many of any size you want.
The first places to attack with extra bracing are those most prone to unwanted vibration. Large panels respond well to being tightened up, reducing their ability to "sound," like a drumhead, when excited by the acoustic energy inside the box. Places where the baffle is cut for the drivers, and hence weakened, are also ideal candidates - since not only is the material weakened by the cutouts, but this is where the "equal and opposite reaction" energy of the drivers enters the cabinet material directly. Often you will find that these two become one and the same - the rear panel is the largest, and putting in front-to-back braces around the woofer, say, will stiffen it nicely.
There are two general ways to brace panels - one is to run the brace between two opposite panels through the open space in the box, and the other is to mount the brace as a rib across the panel in question. These two methods can be combined, of course. "Opposite" braces have the advantage of simultaneously adding rigidity to two panels at the same time. "Rib" braces are useful when a large panel does not face a convenient "opposite" panel to brace to (for example, the rear panel directly behind a woofer) but they do need to take up more space in order to be as effective, as their width is what gives them strength.
A third kind of brace, which can be difficult to retrofit due to their typically being too large to get in through the driver holes, is a "shelf" brace. This kind of brace is built as one piece that attaches to all the sides of the cabinet, and has a large hole cut in the middle to allow the free movement of air inside the box. Shelf type braces can, however, effectively be added to a completed cabinet by building rib braces for all the panels and gluing/screwing them to each other at their ends.
A mix of opposite and rib braces also results in something much like a shelf brace.
Attaching braces to each other increases their effectiveness, if it is possible. Two "opposite" braces, for example, one front-to-back and one side-to-side, could be glued and screwed together where they cross. Likewise, one end of an "opposite" brace can be attached to a "rib" brace crossing one of the panels it connects to.
If I am rebuilding speakers that would seem to benefit by it, I usually add some "opposite" braces around the woofer cutout (considering the typical 2 way speaker system). To do this the easy way, I measure the length carefully and set up my table saw to cut to this length. I'll take a piece of scrap 2x6 or 2x8 lumber, cut a piece off and check that it is a tight but strain-free fit. When the saw is just right, I'll cut a couple more pieces of the lumber. Then I split the lumber with a hand axe, making 3 or 4 braces out of each cut piece. I then smear wood glue all over the ends and inside the cabinet where they will end up, and slide them in place (wiping off any excess glue that might be in inappropriate places). Sometimes I will drive a 2" or so screw into each end from the outside of the panels, depending on how this will affect the cosmetics.
Another approach is to use 1/2" or 3/4" MDF or particle board. Either make a lot of 2" wide strips first, to cut to length, or rip a 12-20" long piece to the right width (the width of this piece is the length of the braces) and then cut that piece up into 2" widths. Installation is similar.
Another popular method is to use 3/4" to 1" dowel. It is nice and neat looking, easy to buy at hardware stores, and glues in well.
The warning to keep in mind while planning your braces is not to reduce the internal volume of the cabinet too much. The rebuilding examples shown below meet this criteria. One way to add a lot of weight and improve rigidity without affecting internal volume is to add a complete extra layer of 3/4" MDF or particle board to the outside of the cabinet back panel, as long as setting up the connection terminal will be viable. While this could be "ugly," it is also out of sight, and if painted black will tend to disappear.
Here is an assortment of photos from various projects to illustrate these techniques (each one is linked to the project it represents).
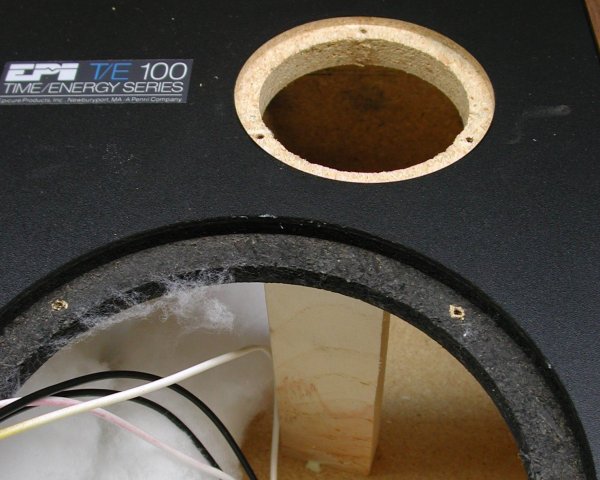
A basic front-to-back brace at the weakest point of this EPI T/E 100 cabinet, between the woofer and tweeter holes:
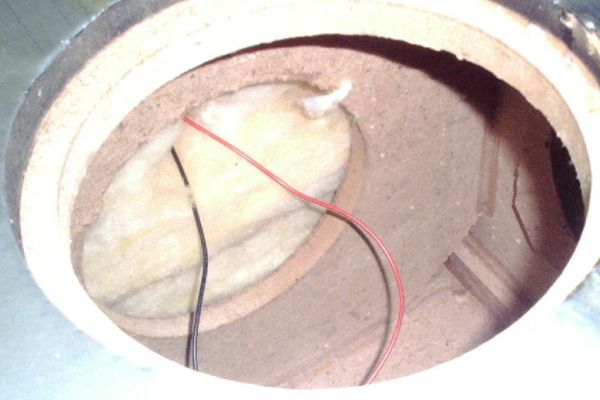
Factory installed shelf bracing in an EPI 1000:
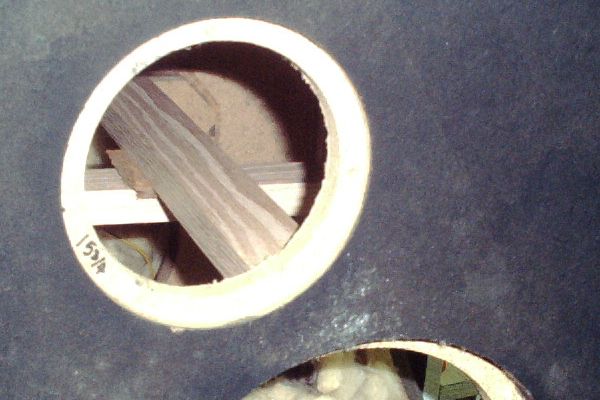
A pair of "opposite" braces I installed while rebuilding my EPI 1000's:
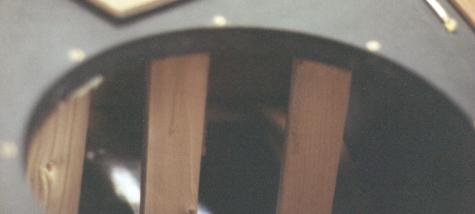
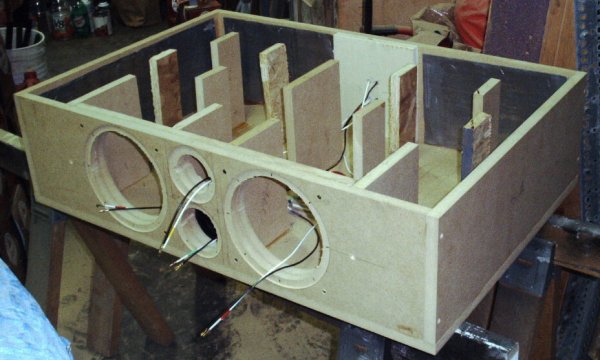
Some "opposite" braces installed around the woofer cutout in some Genesis 3's:
A lot of "opposite" and "rib" type braces set up in a HUMAN C3 I built for myself:
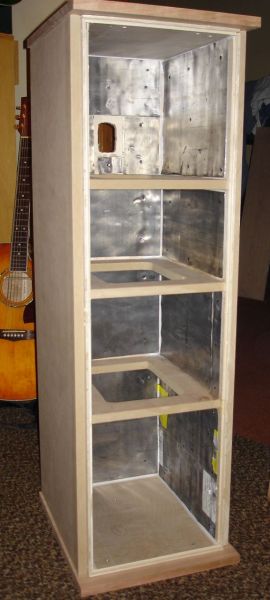
Here is an example of a DIY cabinet for some 8841's showing shelf braces and lead damping:
* * *
Top - Contact
New Speakers -
EPI and Epicure - Genesis Physics
© Copyright - All Rights Reserved
![]()
Seven Kelsey Road, Lee, New Hampshire 03861
Prices can change and specifications will improve without notice