The long-awaited HUMAN 81 DK is now available.
Best viewed in "landscape" mode.
construction techniques - final assembly - detailing and finish work - building grilles
Perhaps the most satisfying "do it yourself" experience with home loudspeakers to be had is building the speaker enclosures, or cabinets, yourself and installing a proven high quality system of components in them. The quality of the sound is assured by the use of components designed to work well together and the appearance and quality of the final product is under your design and control.
I try to encourage this approach using my speaker components, since they provide a high level of performance without any extra effort on the part of the home builder, while the design and execution of the cabinet construction itself gives the immense satisfaction of producing something out of your own imagination and finished to your own taste.
Here I will try to set forth as much as I think I know about this subject, hopefully arranged so the beginner or the curious can read the whole file and learn what they need to know, but also so the experienced hobbyist can jump around to see if I may have shed some light on any aspects they are not fully versed in already.
- Note 1: I will use the words "cabinet", "enclosure", "box" and sometimes "baffle" interchangably as synonyms throughout this text, usually just for variety. They all refer to the same element of the speaker system, although "baffle" is often used to mean just the front panel.
- Note 2: Although some parts of the individual sections are presented as a series of steps, in order, the overall structure of this file is not particularly linear. For instance, some of the topics in the finish work section should be planned before buying any materials at all. I would recommend at least skimming this entire document (and any other information about the subject you have access to) before embarking on your speaker building project.
construction techniques - final assembly - detailing and finish work - building grilles
The first question to address is why we build cabinets for speakers in the first place. Why not just pile the parts up aimed at the listening area and plug them in? There are essentially two parts to the answer to this question, which combined result in the sort of enclosure you usually see in most speakers.
The first is to hold the speaker parts in place relative to each other and the room. This is mostly a solution to the trivial mechanical issue of ensuring that the various components do not move around while they are doing their job of converting an electrical signal to physical motion. There is also the fact that the physical arrangement of the various elements will affect the overall sound quality, for better or worse.
The second is due to the symmetrical nature of the output of dynamic cone type drivers. Sound is reproduced and radiated equally from the front and the back of the cone, but in exactly the opposite "phase". What this means is that when a driver is operating with no enclosure at all, a lot of the energy it produces at some frequencies will cancel out due to interference of the wave from the rear and the wave from the front of the cone. This is most apparent at the lower frequencies, since they have a long wavelength and even after the two waves (front and rear) have travelled slightly different distances before they combine, they are still almost completely out of phase and cancel each other out. With the higher frequencies, the difference between the distance travelled will be more likely to be several or even hundreds of wavelengths, resulting in some interference effects but nothing as extreme as the almost complete cancellation occurring at low frequencies.
If this sounds like gibberish to you and you want to study more about waves and interference so it makes more sense, any decent high school physics textbook will cover most of these issues under the sections about light waves. While the wavelengths and medium are radically different, the wave related mathematics are identical.
Almost all tweeters and many midrange drivers are manufactured so as to have a built in enclosure, preventing the rear radiated wave from interfering with the forward, desired wavefront. If you read the section on cabinet size and its effects on low frequency extension you will be able to infer why tweeters often have miniscule "enclosures" and midranges often just have sealed baskets or a smallish container built onto their back.
So you see the reason we put the loudspeaker drivers in a box is to position them firmly in the listening space and to control the "backwave" from the cone(s). In the next section I will discuss a third function of the box - controlling the low frequency response linearity
construction techniques - final assembly - detailing and finish work - building grilles
Simply building some sort of "baffle" to prevent the rear and front waves from a driver from interfering are not enough to get great sound. There are many different reasons for this, of varying importance and subtlety.
In the old days, woofers were huge and mounted in large boxes, often with "bass reflex" port devices, sometimes built to be giant "folded horns". The higher frequencies were reproduced by horns mounted above them. These systems were often very efficient, that is they were very loud for a given amount fo voltage input, but usually had very irregular frequency response and often quite poor low bass output considering how much of the room was given over to the speaker system.
Then in the 50's the theoretical groundwork was laid for the development of the "acoustic suspension" loudspeaker enclosure. The specifications used in making the calculations involved in this process have become the Holy Grail of people who think all there is to designing a great speaker is to drop a bunch of specs into a computer program and build what it says to build. (I hope my sarcasm is not dripping too violently here!) You have seen them everywhere, including in the specification file I somewhat reluctantly include elsewhere on this site. These are called the Theile/Small parameters, after the men who developed the theories, and they look like Fs, Qts, Vas, and things that look like that.
What these numbers hide behind them is the fact that a special kind of speaker can be produced, with a very compliant, or floppy, suspension, usually with a long throw voice coil and small diameter cone, and installed in a small cabinet, which is then able to produce bass frequencies that are not only lower than the huge boxes of the past but also equal in output level to the higher frequencies produced by the driver. The equal in output level part is where all that enclosure size math comes in. The higher frequencies produced by the driver, which can be engineered to be linear relative to the input signal, need to be matched in output volume by the lower bass notes in order for the speaker to sound good. As the box size is varied, the relationship between these levels can be predicted with enough accuracy to make a small speaker with a good linear low bass response.
This aspect of the cabinets effect on the sound basically determines how large, in volume, the enclosure you build will be, and depends entirely on the desired bass extension characteristics of the system you are building.
While my brief summary above is biased in preference of the "sealed" enclosure type commonly known as acoustic suspension (since the air trapped in the box is the main "spring" against which the cone pushes) the same science is utilized in approximating the behaviour of a driver in a "vented" cabinet - and I say approximate because the result always need to be listened to and adjusted for optimal results.
There are a host of other issues brought up by using a big hunk of material to support the loudspeaker drivers. The solutions to these problems will be addressed under "construction". I will try to be brief about them while not giving them short shrift...
Resonance
Every system of objects in the universe has various resonances associated with it. These are the frequencies at which it will "ring" when energy is introduced. What this ringing means is that certain frequencies of energy are encouraged by a given system, giving it a characteristic "sound" if the energies are in the audible range (a carefully controlled version of this fact is how the whole bass response thing above works). It means that the speaker box is going to introduce colorations to the sound being produced in it, by accenting certain frequencies by different amounts. The actual drivers themselves will often have mechanical problems for this reason as well. Ideally, of course, the system and its components will exhibit no resonances at all.
Stability
Every action has an equal and opposite reaction. Where have we heard that before? Yes, more high school science! In our case, the "action" is the motion of the loudspeaker cone, forward and backward, which is supposed to produce a faithful replica of the electrical signal being fed into it ("music") in the form of compression waves in the air in your room. The "reaction" is an equal and opposite (duh!) motion, or more accurately, energy, imparted to whatever holds the cone in space. In our case, the drivers chassis, attached to the cabinet. What this means is that the box you build is going to be pushed back and forth by the efforts of the drivers, with most of the problems occuring in the bass (since there is much more energy involved and the cones and air being moved have more mass), and this is not good. Energy is wasted if the cabinet moves back and forth, the less it moves the louder the speaker will be. Also, the motion of the box is then imparted to the other elements mounted in it, superimposing an altered version of the bass being produced on the higher frequency sounds, "smearing" their time, or phase, relationships and distorting the quality of the sound.
Diffraction
More high school physics... when we were studying light, we learned that several physical things can happen to waves as they travel, altering their rectilinear, or straight line, motion. The interference mentioned in the "why?" section is one of these. Reflection is mostly a room related issue so I won't go into it here. Refraction occurs when a wave travels from one medium into another at an oblique angle to its direction of travel. Our room is filled with one medium, air, so we'll ignore that here as well. Diffraction is what happens when a wave passes an edge of something, commonly done by passing light through very small slits. Since this effect is related directly to the wavelength involved, it will happen with our speaker boxes at different frequencies to differing degrees. The commonly cited 20 to 20,000 Hz frequencies of audible sound correspond roughly to wavelengths from about 50 feet down to just over half an inch.
At the lower frequencies, the outside of the cabinet is almost invisible and the sound radiates in almost every direction equally (due to the relatively long wavelengths relative to the diameter of the driver's cone and size of the cabinet), without any diffraction effects. As frequency rises, the wavelengths get shorter until the dimensions of the objects they are encountering, that is the amount of cabinet face they cross and the following angles, will diffract them quite a bit. This is the biggest problem with the middle frequencies because the human ear is most sensitive to them and because they will encounter the edge of the cabinet less than a wavelength from their source. This will result in the wavefront projected into the room having a large component of sound that contains the "memory" of the object it encountered (the speaker boxes and any other objects near them) imprinted on those these frequencies.
Diffraction in and of itself is not an intrinsically "bad" thing, it happens to everything we hear everywhere we hear it, for instance the edges of musical instruments diffract the sounds they produce as they are radiated. However, our ear-brain decoding system uses the effect of diffraction to cue it into what it is actually hearing, and this is mostly a result of experience. These days, our ears and brains have a lot of experience with sound waves coming from rectangular boxes, and they are very good at interfering in our ability to think "that is a violin" by telling us "that is a rectangular box" before the pleasure has time to evolve. Literally anything that disrupts this "computation" will improve the perception of the sound, but the best thing to do is to prevent the midrange frequencies from encoutering sharp 90 degree corners within a half wavelength or so of their production.
Position
The relative position in all three dimensions of the separate loudspeaker elements will affect how their output combines in the room to reproduce the signal fed to the speaker. There are mistakes that can be made here, some of which are made by big speaker companies, and there are ways to minimise problems and to improve results. Drivers producing overlapping frequencies should be as close as possible to each other, since we desire the sound coming from both of them to seem as if it coming from one place as much as possible. Angling the speaker face back slightly will often make it so the sounds being produced by the different drivers all travel the exact same distance to the listeners ear, and can also reduce standing wave effects (which are resonances really) in the room. Sometimes the drive units are actually placed in little boxes that are stepped back from each other, though this can introduce a host of diffraction problems if not done with a great deal of care.
Beauty
A poorly designed speaker cabinet will say "Hey, you over there, look at me and suffer!" It will be obtrusive and unpleasing to the eye, taking more attention than dictated by its size and then rewarding that attention with pain. A well considered design will not be noticed, and then when the eye does fall on it and linger, will soothe and please the occupant of the room. Most of the speakers I built as a young DIY amatuer were, to be charitable, "butt-ugly", but so was the rest of my milk crate and cinder block furniture. Beauty is in the eye of the beholder, and it is important to remember that while anything you build yourself may be beautiful to you, other occupants and visitors will have a much easier time complimenting you on your efforts if they are pleasing to eyes as well as the ears. I am not going to hold forth on aesthetics and interior architecture, but some shapes, dimensional ratios, and finish materials are definitely more pleasing, in a given environment, than others.
My main recommendation in this regard is to make a cardboard mock-up of your proposed design. This is cheap and easy, and will quickly let you decide if your concept really does work in your environment. A quick coat of cheap paint will help you decide if your choice of finish will be a good one.
construction techniques - final assembly - detailing and finish work - building grilles
Speaker size is a difficult issue for a few reasons. Ignore all except the functional ones if you want and you can build whatever you want, but most likely other realities besides sound quality will intrude on your dream.
There is an unchangable relationship between three aspects of a speaker that some compromise must be drawn between when figuring out how big to make it. The low end extension, the efficiency, and the volume of the box cannot be changed one at a time. Change one and at least one other will change. For instance, a very small box can yield a very low -3 dB point for the bass extension, but it will have to be an inefficient system. What I am saying is that for high quality, reasonably efficient, low bass response, you need a pretty big box. Bass instruments are big. While the woofer or woofers themselves don't need to be large, the box holding them will be. If this extension is not so important, a much smaller system can be built and still sound very good.
For my systems I try to list "ideal" box volumes, offering a range where appropriate and a description of what the different effects the different volumes will have on the sound. Some of my drivers are very forgiving of cabinet volume, and for that I must tip my hat to Winslow Burhoe, who designed the original EPI woofer most of my products are based on. The shape you use to achieve this internal volume will be affected by aesthetic considerations and sonic ones. A very wide front panel will tend to reduce the effects of diffraction, as will a very narrow one. A box with several similar inside dimensions will tend to exhibit more problems with standing wave internal resonances. To learn what standing waves are, dig out that high school physics text again. A tall thin box may be more difficult to make stable and resistant to driver induced motion.
construction techniques - final assembly - detailing and finish work - building grilles
There are many strange and weird concepts for speaker enclosures out there. While the tried and true rectangular box is the economical choice for most commercial systems, you are free to spend more time on something more complex and difficult to build. The flaws inherent in the simple six sided box are avoidable. They are: parallel sides tend to encourage standing waves; ninety degree front corners induce recognisable diffraction effects; the larger panels tend to flex and resonate; they can be ugly.
A truncated pyramid shaped box isn't too difficult to build and can be more attractive while addressing these issues. So can a box with a simple sloping front baffle - about 15 degrees works well.
Big bevels or even curves on the front vertical corners will strengthen the front of the box and combat diffraction effects. When I say big, I mean a radius of at least several inches, in order for diffraction in the critical midrange frequencies to be reduced. See the photos of the following speakers to see what I mean:
- Epicure model 3.0
- Genesis Physics model 44
- Genesis Physics model 66
- HUMAN Speakers Custom 88 (which was actually a prototype for the Genesis 66)
People have tried many, many creative ways to try to nullify certain box disadvantages. Mounting drive units in the end of PVC pipes, on the side of cardboard construction tubes, in midair to simple support rails, etc. are some examples of this. While it is possible to get good results by experimenting, it is still important to remember all the "generic" criteria included in this file. For instance, designing a weird enclosure to minimise one specific problem might successfully eliminate it, but ignore and exacerbate several others. Try your wildest ideas but don't forget the basics of solidity, strength, non-resonant materials, and good construction techniques.
Some odd arrangements will also require experimenting with different crossovers, since the wavefront formed by the drivers will be altered by the materials around them. If you expect this, I would advise using several separate terminals, one for each speaker element, so your crossover can be mounted externally and experimented with at will.
So long as you don't damage the drivers, you can always return to a simpler box design if your fantasies don't yield the results you expect.
I should have mentioned this more often in this file, but I love to put photographs of my customers projects (using my products, of course) on this site, so feel free to share with me! I prefer shots at as high a resolution as possible, with neutral (or tool and sawdust infested) backgrounds. Attachments to emails are great, but if you prefer to send me prints, I can scan them. Be sure to mention how you prefer to be credited, and feel free to write any text describing the project.
If you have posted such photos on a web site of your own, please contact me with the URL and tell me whether or not you mind my copying it to this site.
construction techniques - final assembly - detailing and finish work - building grilles
Here is a crude list of what matters in building a speaker cabinet...
- The box should be constructed of at least 3/4" MDF or plywood. Particle board used to be common, but it is far inferior to them. A great material to use is a sandwich of 1/2" plywood and 1/2" MDF, with the MDF on the outside. Plywood is slightly better at turning acoustic energy into heat, and MDF is denser and machines very smoothly. The front baffle can be made thicker for even better results.
- The box joints should be sealed properly. Silicone or latex caulk on the inside will work well for this. Butt joints are fine if cut smoothly and attached solidly with glue and screws. Fancier woodworking techniques (dadoes, dovetails, dowels, etc.) will be stronger if you are up to the task.
- Braces can be made of dimensional lumber (I often cut a piece of 2 x 6 to the exact length needed and split it into several braces when reinforcing an existing box) and glued in place with carpenters glue. They should be snug but not too tight - no point in warping the cabinet to get them in! The best places are right around the woofer, and at the weak points between the driver holes. They can even be placed every few inches throughout the entire cabinet, for added solidity, weight, and stiffness. Remember to allow for the space they use up when determining your cabinet volume.
- Another way to brace a cabinet is to build "shelves" that fit the entire cross section of the box, with big holes in the center to allow adequate air movement. These may be trickier to fit or actually ease the construction process, depending on the cabinet shape.
This photograph shows an example of one in an EPI 1000:
- Weight is generally good. Don't be afraid of building a heavy speaker - it will resist small and large scale motion and vibration better. This will improve the sound quality.
- Try to locate your input terminals so the amount of wire inside the cabinet is minimized. Right behind the woofer usually works well.
- Crossover components should be located at least six inches from the drivers to avoid magnetic interference between them.
- The driver mounting areas can be rabbeted for flush attachment, though this does reduce the amount of wood right at the weakest point, where the screws go into the box and the drivers must be held rigidly so they can sound their best. Bracing and perhaps even an extra layer of wood inside the box in that area will take care of this problem if flush mounting is important to you. If the box has been made of very thick material, say 1.5" or more, this is much less of an issue.
- Drivers are easiest to install with coarse threaded #8 screws (or #6 for tweeters). Pilot holes should be drilled to make starting the screws easier. Bolts are difficult to secure well - although firmly installed "steel threads in wood" on the inside can work well. The trouble with them is that they can get knocked out or, worse yet, loosen, making it harder to remove and replace the drivers if you need to change something in the cabinet. Don't overtighten, since you can warp the drivers and weaken the threads' grip. I think about 5-10 foot-pounds is plenty of torque to use. That's barely half a grunt. Plastic terminal cups usually require #6 screws, and even less torque should be used, since they can be cracked quite easily. My kits all include the required screws to install all the parts.
- Various materials can be used to seal the drivers to the box. Things that work well, if not built in, are light foam weatherstripping or a small bead of Mortite ("fingertip caulk"). I don't recommend silicone RTV or any other type of caulk that dries and acts as a glue, as it will make removing the drivers much more difficult if you ever need to do it. And in my experience, gluing something together permanently will ensure that you need to disassemble it for some reason!
- Grille construction - a sheet of masonite with a big hole for the drivers works great, just stretch some fabric over it and use Velcro to attach it to the cabinet. Alternatively, a frame can be made from 1/2" MDF or particle board, with quarter-round outside edges and 45 degree inside edges (to reduce diffraction problems), and attached with ball and socket type fasteners. A grille like this can also be designed to sit flush with the front panel to reduce its interference (diffraction, etc.) with the sound waves produced by the drivers.
construction techniques - final assembly - detailing and finish work - building grilles
When the boxes are finished and all the parts are ready to be installed, lay everything out in a well lit work area and make sure you really do have all the parts. A written "bill of materials" that you have previously prepared will be of great help. Here is an example...
| Parts to build HUMAN 81+ | ||
| description | quantity | check |
| Beautiful box | 2 | |
| PRO 005 woofer | 2 | |
| PRO 002 M2 tweeter | 2 | |
| Crossover with wiring | 2 | |
| Input terminal | 2 | |
| Grille pegs and cups | 8 each | |
| Gasket material | 5 feet | |
| #6 flat head screws (tweeters) | 6 | |
| #8 pan head screws (woofers) | 16 | |
| #6 flat head screws (terminals) | 8 | |
| Grille panels | 2 | |
| Grille cloth | 1 yard | |
| Damping material | About 6 pounds | |
| Floor spikes | 8 | |
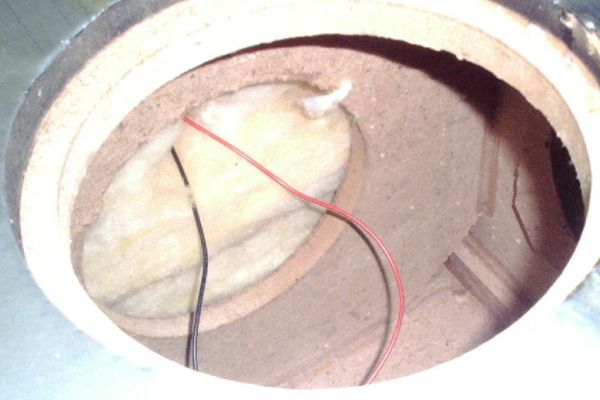
Install the terminal plate in the rear (or on the bottom if that is where you decided to put it). Then, working from the front, glue or screw the crossover into a location that lets all the wires reach their destinations. Attach the crossover input wires to the terminal connections, maintaining correct polarity, and thread the wires to the drivers out their appropriate holes. If the crossover is integral with the terminal plate, this is simpler.
Fill the box with your damping material (fiberglass or polyester is fine, some use more esoteric materials) taking care not to lose track of the wires. Apply your gasketing material to the mounting surface of the drivers or speaker holes - all that is required is enough to fill the irregularities in the surfaces, so a thin bead is fine.
One at a time, attach the drivers to their wires, observing the correct polarity, and seat them in their mounting holes neatly. Take care that the wires don't get kinked or caught under the edges of the drivers. Now screw the drivers to the box. Be careful not to slip and puncture the surrounds.
To test your speakers, I would recomend taking the gradual, careful approach. First attach an ohm meter to the input terminals and measure the speaker's resistance. It should be in the 4 to 8 ohm range. This step is to make sure there aren't any accidental shorts inside the system. Then hook them up one at a time to an amplifier, with the power off. Turn the volume all the way down and turn it on. Select a source (test tones are great, otherwise use some clean, well recorded music) and gradually increase the volume to a fairly low level. Listen for any "bad" sounds - buzzes, rattles, sirens, etc., and then raise the volume to a moderately loud level. If there are no problems observed, turn everything off and repeat this process with the other speaker.
If all is well at this point, try to be patient! Hook up both speakers to a fairly wide frequency range source and leave them playing overnight at a low level - not too quiet, though, you want to exercise the woofer surrounds a little bit.
The next day they are ready for some listening pleasure. They will typically "break in" slowly over the first ten to twenty hours of use, sounding better every day. After that, they are ready to be demonstrated to innocent bystanders.
I have covered building grilles elsewhere, obviously around now you will also finish them and install them for the "completed project" look.
construction techniques - final assembly - detailing and finish work - building grilles
In my DIY speaker building projects of the past, I had a tendency to stop as soon as the speakers made sound, resulting in such things as speakers with basketball backboard markings on the sides! I have covered speakers with fake fur (not as ugly as it sounds!), fabric-backed vinyl (as ugly as it sounds), and just plain semi-flat black paint. I think I only put grilles of any kind on two of my dozens of projects, and one of those I built when I worked at Genesis - using an existing Genesis speaker grill to determine the front panel dimensions of the speaker!
You may wish your results to be more aesthetically pleasing than this.
If you have the skills, the nicest speaker finish is real wood veneer or a high gloss paint, usually black. Since plywood and MDF can be purchased with wood veneer already on it, this might not be too difficult to achieve. The corner joints can either be mitered or notched out and filled with solid wood to maintain the quality of the appearance.
To paint the cabinets will mostly depend on skills you already have and that I couldn't begin to describe, but basically the techniques are similar to auto body work. Lots and lots of sanding, body filler to smooth any indentations, scratches, or screw holes, and multiple coats of a good quality of paint applied in a dust free environment are all that is necessary.
It is quite possible to match your cabinets to your home decor with a little creativity. Wood or metal moldings can be added to the top and sides of the boxes to integrate their appearance with period or modern furnishings. Grille fabrics can be chosen to complement your taste and are easily changed - even the actual shape of the enclosure can serve to make it look like it belongs in your living room.
construction techniques - final assembly - detailing and finish work - building grilles
* * *
Top - Contact
New Speakers -
EPI and Epicure - Genesis Physics
© Copyright - All Rights Reserved
![]()
Seven Kelsey Road, Lee, New Hampshire 03861
Prices can change and specifications will improve without notice