The long-awaited HUMAN 81 DK is now available.
Best viewed in "landscape" mode.
202/250 Kit: Story and Photographs
Back to the K-202 page
Inspired by my rethinking/upgrade of the EPI 250 in my execution of this project, long time customer and EPI fan Ed decided to build his own pair.
What follows is his (edited) story and the photographs he sent me:
 The box construction technique I used for the EPI M250 "clones" is 100% free of fasteners and uses fluted ash 1/4" and 5/16" dowels and is basically a very stiff/strong "cage" of walnut, with veneered MDF side panels and solid walnut tops and bottoms attached to the frame with dowels.
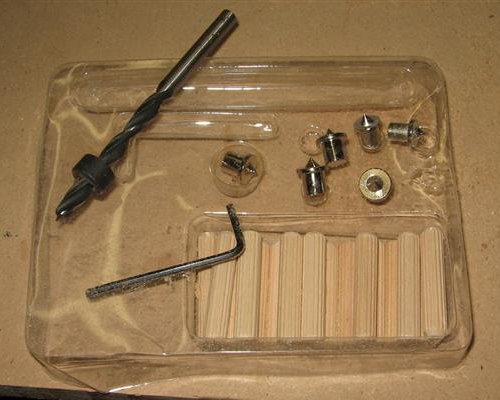
Dowel alignment is made foolproof and simple with a dowel locator kit ($4 from Harbor Freight including dowels):
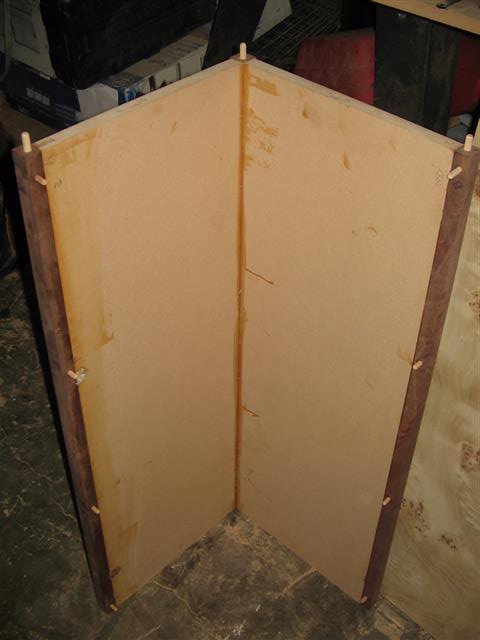
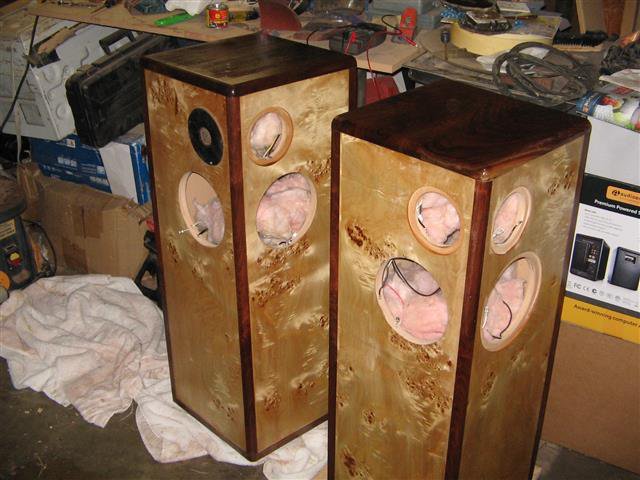
To the right, the first cabinet is just sort of sitting together (the front edges of the top will be rounded over). I'm not sure if I'll dye/stain/darken the burled mappa (a species of Macaranga, a large genus of Old World tropical trees in the family Euphorbiaceae) veneer on the front panels yet.
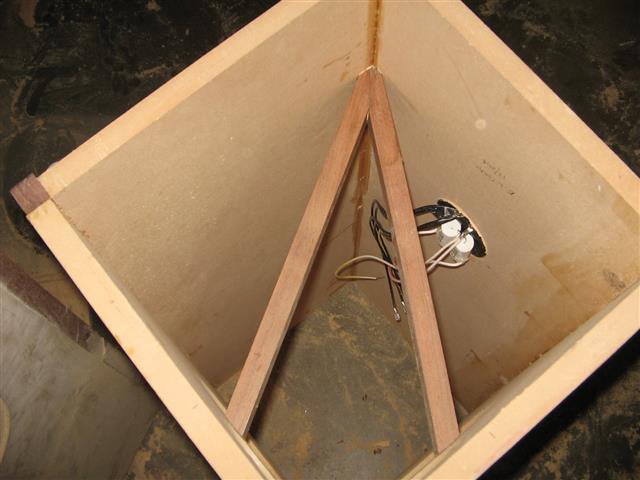
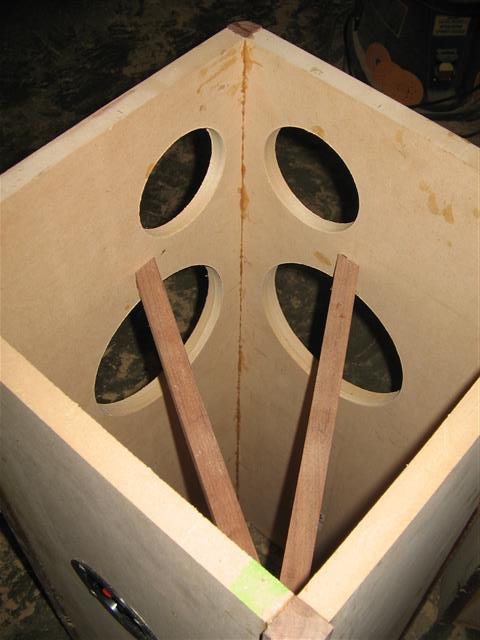
With all the driver holes cut, I got the two halves married together today, along with installing the wiring harnesses. I added a corner brace to better support the drivers at the weakest point between the cutouts. It's walnut and doweled into the opposite corner post and into the sides at the driver locations. It should significanly raise the fundamental frequency of the enclosures, as the first mode is almost always the heavy drivers moving in and out at the center of the panel that they are mounted to.
The front MDF halves are slid onto the glue covered two dowels sticking out the ends of the corner brace and the four dowels along each post/edge then clamped while all the joints dry.
Basically all that's left to do is do is the final sizing/squaring up of the tops and bottoms and the routing of the top front edges, and then I'll install the ends after adding batting to the insides (with the driver wires stapled to the edges of their respective openings). Four 5/16" dowels from each corner post will be used to secure the tops and bottoms to the sides.
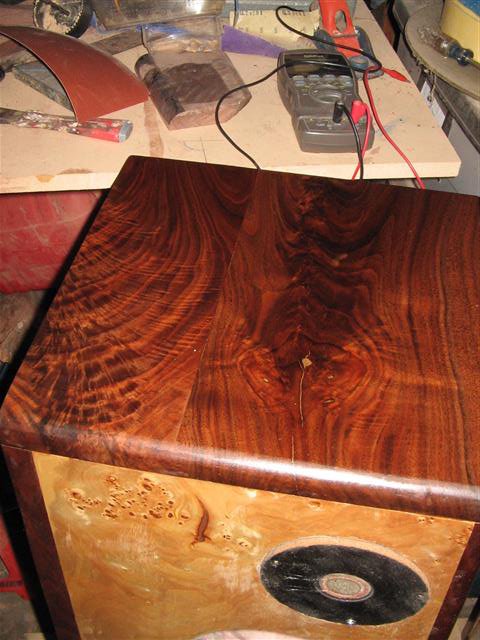
I'm just a little disappointed that the polyurethane "clear" finish imparts a slight amber hue (that I learned later from reading the can label) - I preferred the more contrasting whiter natural hue of the mappa burl.
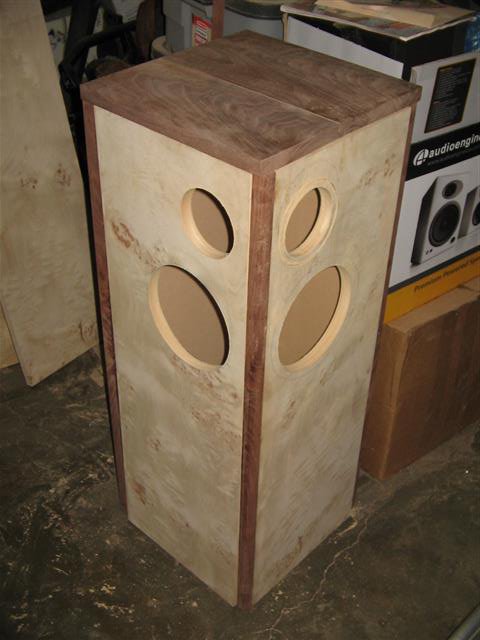
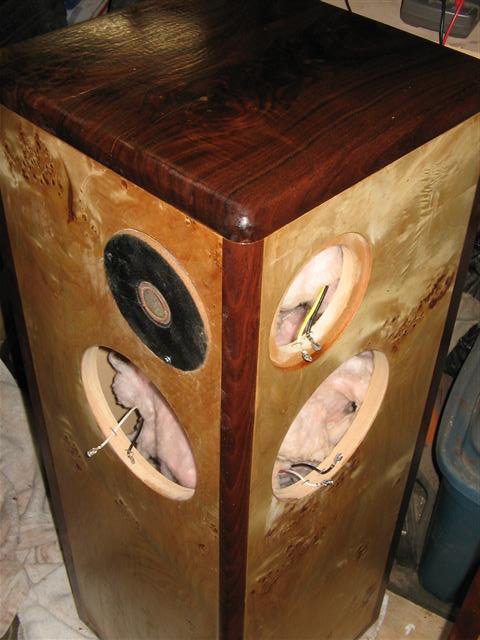
The veneered front panels with the drivers are flush mounted with the walnut side/frame posts and the top edges above these panels and the post common to these two panels have a quarter-round 3/4" radius to smooth the sound waves path around the corners. The partially installed tweeter shown in these photos is just sort of hanging there and will be flush to the panel when all three screws are used to mount it.
So here they are, sans drivers except for one old EPI tweeter - I was going to wait until all done, but found out that the router bit that I need to do the woofer rabbets will not be here for another week.
|
|
* * *
Top - Contact
New Speakers -
EPI and Epicure - Genesis Physics
© Copyright - All Rights Reserved
![]()
Seven Kelsey Road, Lee, New Hampshire 03861
Prices can change and specifications will improve without notice