The long-awaited HUMAN 81 DK is now available.
Best viewed in "landscape" mode.
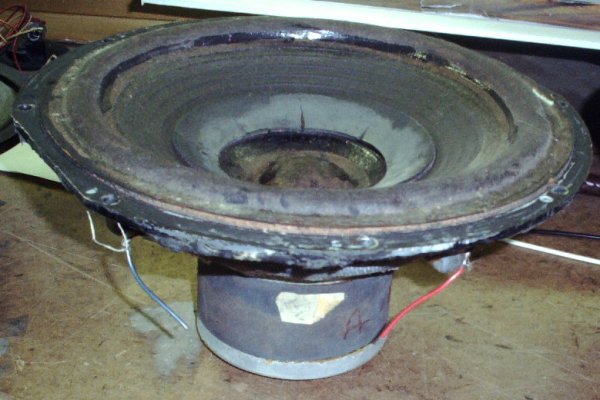
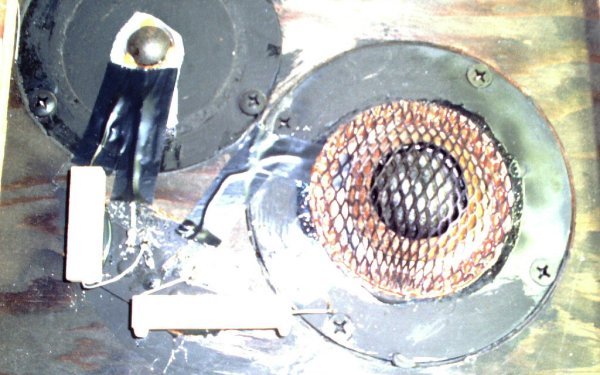
I recently had the privilege of refurbishing a tired old pair of the classic Acoustic Research 3a model. This is a three way speaker using a roughly 12" woofer, a 2" dome midrange and a 0.8" dome tweeter, all hand made, the good old fashioned way.
Most of this story will focus on what I did inside the speakers to make them sound great again. Although I am sure I could rebuild this woofer if necessary, any issues with bad midranges and tweeters will have to be solved by searching out used, working drivers.
This particular pair had good drivers all around, except for one intermittent midrange, which I actually had a replacement for on hand.
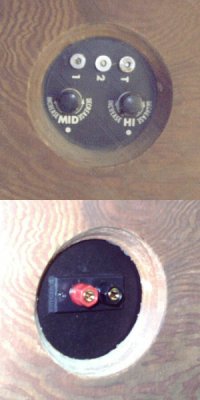
The crossover and wiring, however, had seen better days, and some of the parts would not play. So I opened them up to see what I would find. The original crossover uses a pair of rheostats to adjust tweeter and midrange levels, and some bizarre, ancient wax paper capacitors. The speaker wire terminals on the rear are also difficult to use little set screws. My project was to analyze the crossover, rebuild it using better components where appropriate, and replace the connection method with some nice binding posts. Here is my little illustrated set of instructions for doing this.
First, this is the schematic of the crossover used in these examples:
Key to Crossover Symbols and Component Values (in a new window)
And here is what I did, should you wish to duplicate this process.
1. Remove woofer and cut its wires a couple of inches from it.
2. Remove the fiberglass from the cabinet.
3. Before going further, verify that yours are like this example to avoid confusion.
4. Identify the midrange and tweeter wires and cut them near the crossover.
- Tweeter: yellow/black; Midrange: yellow/green (same yellow wire)
5. Test each driver with a signal generator and amplifier.
6. Identify and mark each of the three inductor coils for re-use.
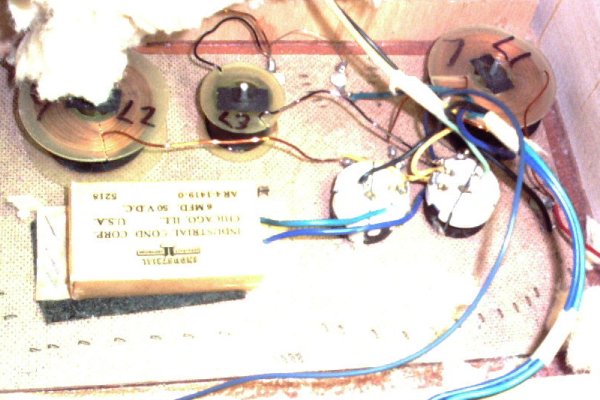
7. Identify the huge brick shaped double capacitor, cut its wires and remove it.

8. Turn the box over and start removing the crossover/terminal board by busting it with a hammer.
9. Go back inside and finish removing as much of the board as you can, while removing the inductors from their mounting posts and clipping their leads. Strip about 1" of the varnish from their leads.
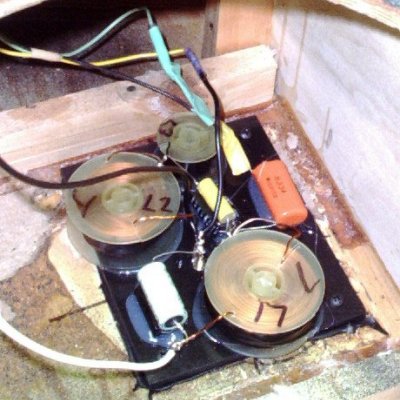
10. Set up your new crossover/terminal boards to build on.
11. Lay out the inductors, new capacitors, and wiring.
12. Glue them in place, and solder all the connections carefully.
13. Test the board position and wiring lengths, then install the board in the cabinet.
- (I used some nice black caulk to seal the boards, as the inside of the cabinet was very irregular. It can take some fiddling to make sure the new terminals are centered and straight in the hole in the box.)
14. Connect the midrange and tweeter wires to the new crossover, and test with a signal.
15. Connect the woofer temporarily and test, then set aside.
16. Replace the fiberglass damping material.
17. Connect and reinstall the woofer.
18. Test the system.
I found that without any resistive elements in the tweeter and midrange circuitry, that the speaker was rather "forward," or bright, but very, very clear. A simple increase of the bass level at your amplifier might be enough to compensate for this, but my customers wanted me to make it sound "right" as it was, so I experimented a bit and installed resistors in the external wiring to the midrange and tweeter, right on the front of the cabinet. This may seem ugly, but the grill covers them completely, and also they can be changed easily if this is ever desired. I used a 6 ohm resistor on the midranges and 4 ohms on the tweeters.
I also cleaned up the wires from the front terminal to the midrange and tweeter, and replaced most of the old electrical tape that held them in place.
Now that the speakers are done and back in their rightful happy home:
"Just a note to say GREAT JOB! The speakers sound great. Thanks for your efforts."
And:
"So, I guess I'll refinish the wood on the speakers. 'B' has a habit of overflowing the flower pots when I go away and then never going back to check so they sit there wet for days! Now I move the pots before I leave. Some new fabric and they'll look terrific again. Thanks again."
It's always a pleasure to bring someones treasured speakers back to life again.
* * *
Top - Contact
New Speakers -
EPI and Epicure - Genesis Physics
© Copyright - All Rights Reserved
![]()
Seven Kelsey Road, Lee, New Hampshire 03861
Prices can change and specifications will improve without notice